
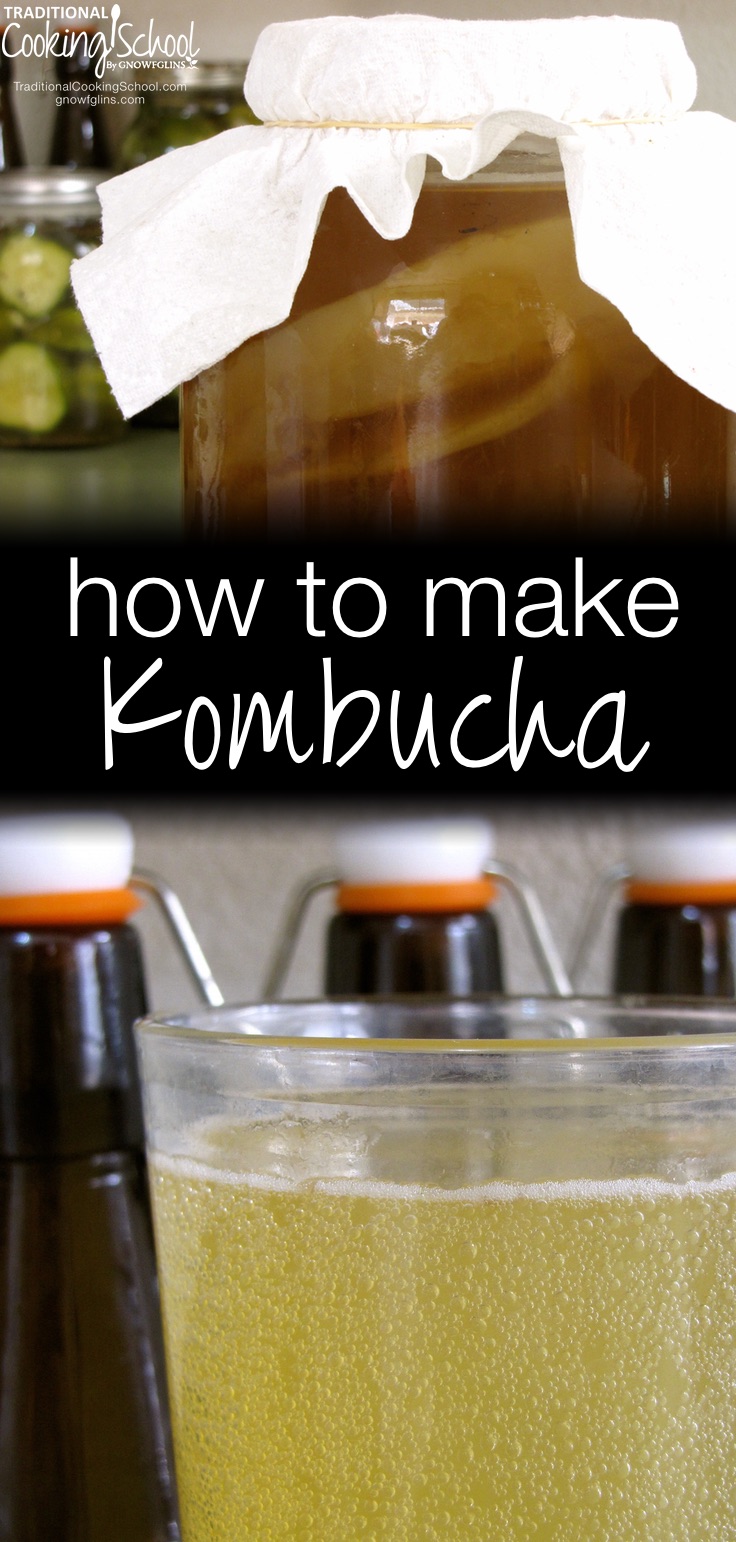
Kombucha, from Russia, is a widely known and loved fermented, probiotic beverage. It’s both sweet, sour, and naturally carbonated by fermenting gases! Many people drink it like soda.
Purported health benefits of drinking kombucha include cancer prevention, arthritis treatment, improved digestion, and a boost to the immune system. Just a few ounces a day can help with any one of these issues.
Though you can buy great organic, raw Kombucha, it’s very easy to make and you’ll save money. Here’s how.
Never had it? You just might love it!
Interested in fermenting more of your own foods? While you’re here, be sure to grab my free fermenting formulas cheat sheet that will give you proportions and ingredients for all kinds of ferments — from salsas and relishes to krauts, jams, and beverages. Grab it here.
Kombucha
Kombucha, from Russia, is a widely known and loved fermented, probiotic beverage. It’s both sweet, sour, and naturally carbonated by fermenting gases!
Ingredients
- 6 tea bags or 2 tablespoons leaf tea, organic green or white tea
- 1 cup sugar of any kind, I use organic evaporated cane sugar, unrefined sugar, OR 3/4 cup raw honey
- 1/2 gallon pure water plus more
- starter scoby Kombucha “mushroom”
- mature/finished Kombucha about 10% as much as each jar’s volume
- 1 gallon jar or 2 half-gallon jars
- wooden stirring spoon
Instructions
Determine quantity of Kombucha...
-
Use 1/2 gallon water, 6 tea bags or 2 tablespoons loose tea, and 1 cup sweetener (or 3/4 cup honey) for each gallon of Kombucha you’re brewing.
*Feel free to scale up to make multiple gallons at a time!
Start your Kombucha brew...
-
Put water and tea bags or loose tea in a big pot. Add sweetener, if crystalline. If using liquid sweetener, wait.
-
Bring to boil, and then remove from heat. Let steep 10 minutes, then strain out tea bags (or tea leaves). Stir in liquid sweetener, if using.
-
Add cool water so that the tea temperature is comfortable to the touch.
-
Add scoby to jar(s) if not already there, and barely cover with mature/finished Kombucha (about 10% as much as the jar’s volume) if not already covered.
-
Divide brewed tea equally among the jar(s).
-
Fill up the rest of the jar(s) with pure water to within 1 inch of top, at the place where the neck of the jar begins narrowing. This is where the scoby will float and grow. If the jar is filled too high, the scoby won’t be able to grow as well. Stir with a wooden spoon to evenly distribute water and tea.
-
Turn the scoby so the lighter side is floating toward the top. If it isn’t floating at the top, don’t worry, it will rise on its own.
-
Cover jar(s) with a towel to keep out fruit flies, dust, or other contaminants. Secure with a rubber band.
-
Arrange jar(s) on a clean beach/bath towel in a warm place, perhaps near a heating vent or cookstove, where they can rest undisturbed for several days.
-
Optional: Wrap a bath towel up and around jar(s). Lay another towel across the top. The Kombucha needs to stay warm and breathe, while being protected from dust and other contaminants.
Check your Kombucha brew...
-
After 3 or 4 days, unwrap the jar(s) if they were wrapped in towels. If your house is warm, do it even sooner. The warmer your house, the faster the tea brews. My Kombucha tends to finish up around 5 to 7 days. I believe the average is 7 to 10 days or longer.
-
Does the scoby look healthy? Has it risen to the top of the tea? Is it growing a lighter-colored layer on top of the older, darker part? Is its surface smooth? Are there little brown sugar castings (that is what the scoby leaves behind as it eats the sugar)? Are there little bubbles in the tea (natural carbonation)? The only thing to watch out for is fuzzy mold (like on bread). Everything else is a good sign!
-
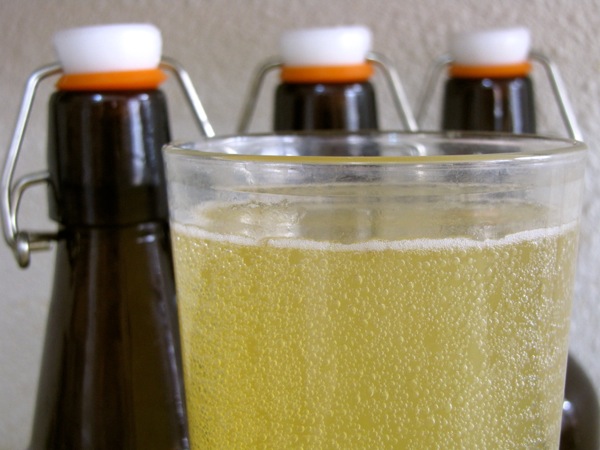
Now taste the Kombucha. Remember how sweet it tasted on the first day? You’re looking for a sweetness with a bit of a sour kick to it now. It should also have natural carbonation. If you feel a good urge to burp, yay!
-
If it's too sour like tasting vinegar, it's probably brewed for too long. Continue with directions below but add more sweetener to taste and let re-brew for a few days.
-
If it is still very sweet with no kick, wrap up the jar(s) again (optional) and let them continue brewing for a few more days. Check daily.
Finish your Kombucha brew...
-
If it is ready, it’s time to pour it off into storage containers (canning jars or 1 gallon jugs) OR move on to a second fermentation with dried fruits or fruit juices.
-
Pour the contents of the finished jar(s) into a storage jar. Leave scobies in the original jar(s) with enough mature Kombucha to cover them.
-
The now almost-empty jars should be lightly covered with towels as they wait to brew a new batch of Kombucha. It will be fine for many days, but why wait to start more of this delicious tea?
-
For bottling, second fermentation methods and/or bottling instructions, plus updated instructions, see our Lacto-Fermentation eCourse or eBook or this #AskWardee.

The photo above shows my 7 gallon-size jars that I keep in rotation in order to brew a constant supply of Kombucha. As you can see, there are various stages. Edit: Nowadays we use a continuous brew system like this!
The three jars farthest to the left are the most mature. The mushroom is floating at the top and you can see the youngest parts (lighter, almost white-colored) growing at the top of the floating mushroom.
The next two jars to the right were just filled with fresh tea, and you can see that their mushrooms haven’t yet risen to the surface.
Finally, the two jars on the far right are empty except for a bit of mature tea and the scobys — they are waiting for new tea to fill them.
Other Notes
I alternate between using plain green tea and jasmine green tea for the tea base. I can’t describe the resulting taste of the jasmine tea, except to say that it is different, fragrant, and worth trying just to see if you like it. We do. (Update: now I use white tea.) You can shop for quality green or white teas here.
New scobies will grow in room temperature, finished Kombucha left exposed to the open air. There’s still sugar in the tea, and tiny scoby particles that weren’t caught by the funnel.
As you pour off small amounts to drink, strain once again with a funnel. I typically keep a carafe full of tea out on the counter for people to drink throughout the day. I fill it up as it gets emptied.
After brewing numerous batches, the scoby can be quite large. I keep my scobys about 1-inch thick. When they grow thicker than that, I peel off the bottom layer (keeping the newest growth in the jar) and feed it to the goats. Some of our goats absolutely love to tear into those mushrooms.
Or, if you don’t have goats, compost it! Or give it to the chickens. Or share it with a friend. Or create a scoby hotel!
Also, I don’t wash my jars in between batches. I wipe down the outside of the jar(s) after pouring off a batch. As long as the Kombucha keeps producing well, that means there is a healthy culture growing in the jar. If I had a bad batch (not just sour, but bad/moldy), I would wash and sterilize and start over.
What About White Sugar?
This is a side issue, but a question you might likely have. Why don’t I use white sugar in my Kombucha, as Sally Fallon Morell recommends in Nourishing Traditions?
She wrote that when consuming white sugar, the scoby produces more glucuronic acid (a powerful cleanser). Rapadura and honey work as well, but the glucoronic acid produced is less.
However, I prefer unrefined sweeteners — whether or not white sugar produces more beneficial compounds. If Kombucha is a traditional fermented beverage, then my choice is to use a traditional sweetener, and white sugar is not that.
So… we use honey! You can read about that here.
About Honey
Update: Someone suggested that honey, being anti-microbial, would kill the scoby. I haven’t seen that happen myself, and further reading has suggested that honey can work as a sweetener for lacto-ferments because it is diluted and because it was traditionally used for fermented beverages. I make this judgment myself, just as you should do for yourself. Please see this Q & A on honey in lacto-ferments for more details or #AskWardee 085: Can You Make Kombucha With Honey?
More Info?
Also be sure to check out these articles:
- The ULTIMATE Kombucha Guide
- Continuous Brew Kombucha {Wardee’s review}
- Can You Make Kombucha With Honey? #AskWardee 085
- How To Divide A Scoby #AskWardee 083
- How To Bottle Kombucha (aka Second Ferment) #AskWardee 086
- How To Create A Scoby Hotel
- Where To Buy A Kombucha Scoby
- Where To Buy A Jun Scoby
- Get Kombucha! {Wardee’s podcast}
- 5 Kombucha Flavors for Fall
Fermenters: Free Fermenting Formulas Cheat Sheet
Other Fermented Beverages
- The ULTIMATE Water Kefir Guide
- 50+ Probiotic & Fermented Drinks Beyond Kombucha & Kefir!
- How To Make Beet Kvass
- Is Jun Right For You? All Your Questions Answered!
- Honey-Sweetened Ginger Beer {probiotic, non-alcoholic, GAPS-friendly natural soda!}
- Spontaneously Fermented Sparkling Apple Cider
- 5-Minute Probiotic Mixed Berry Switchel {Paleo, GAPS, AIP}
- Do you make Kombucha? What sweetener and tea do you prefer to use?
For more information about Kombucha, see my Lacto-Fermentation eCourse or eBook, both of which contain updated info, second fermentation instructions, bottling instructions, and other fermented beverage recipes.
Interested in fermenting more of your own foods? While you’re here, be sure to grab my free fermenting formulas cheat sheet that will give you proportions and ingredients for all kinds of ferments — from salsas and relishes to krauts, jams, and beverages. Grab it here.
Disclaimer: I’m not a doctor. All information is intended for your general knowledge only and is not a substitute for medical advice or treatment for specific medical conditions. You are responsible for your own health and for the use of any remedies, treatments, or medications you use at home.
...without giving up the foods you love or spending all day in the kitchen!

2 free books:
Eat God's Way
Ditch the Standard American Diet, get healthier & happier, and save money on groceries...
We only recommend products and services we wholeheartedly endorse. This post may contain special links through which we earn a small commission if you make a purchase (though your price is the same).

This is so great. I ordered 8 gallon jars from Azure, thinking I would use all for storage, but have 4 with nothing to store… I think I have a use for them now! Where is a good place to buy my first scoby?
Hi, Jen! I just emailed you about sending you a part of one of my growing scobys.
Jen,
My emails to you aren’t getting through. I will be happy to send you a part of the one of my growing scobys for the cost of shipping. I’d have to pack it in a flat rate box and send it priority, which could be $8 or $9.
I feed my extra scobys to the goats, so I have enough to share. I’ll probably have more in a week or two. Please email me at info @ gnowfglins dot com with your address. Do you have another email besides the one you used for this comment because it is rejecting my emails saying I am a virus? 😉
Wardee – Well, I think I messed up my first batch! I thought it was just extra tangy, but my husband spit it out… I did have it fermenting for 7 days. I honestly just kept on forgetting to taste it. So now I’m thinking of just starting over… SIGH! 🙂
Ok, just tried my second batch and compared it to some store bought (I had never had any besides the other sour batch) and this one was better. It’s not as fizzy as the store bought, but I like the flavor… thanks!
Jenn, you can get it fizzier by doing a second ferment after taking out the scooby, put it in the storage jars on the counter with a tightly closed lid (remember to burp it a few times a day to avoid explosions) as it referments the carbonation increases. —Jenn
Hi Wardee! I would love to start making my own batch. My son has a rash on his arm for months now, and I would like to use the tea for its health benefits.I was wondering if u could send me a Kombucha mushroom. My e-mail is [email protected]. I would greatly appreciate it.
Sincerely,
Keya
Keya,
I will send you an email on Monday, perhaps sooner.
Ok! That would be great.
Thanks,
keya
I was introduced to K-Tea when I visited my sister in Virginia and was given a mushroom. Then I ordered and just received a continuing canister from GetKombucha.com and it holds 2 Gallons. I need a simple to follow – as I am a simple thinking person (dyslectia) I have about a gallon of K-tea ready – about 2c of starter tea and the new mushroom that came with the canister and some recommended tea (loose in a bag). Please help me with a 2 gallong recipe and then when it is ferminted right and I bottle 1 1/2 gallon off how do I replenish? do I just repeat the recipe? Thank you!!!!
Lynn,
My recipe (above) is for 1 gallon of Kombucha, so you would double it. Meaning, use 1 gallon of water, 12 tea bags, and 2 cups of sweetener to make the tea. Since you’re using loose tea that came with it the kit, are there directions for how much to use? If it were me, I’d start with 1/2 cup of loose tea per gallon. I would adjust in the future depending on how I like the taste.
Let the tea cool. When only slightly warm, put it into the canister along with the starter scoby and the 2 cups of starter tea. Then add more water, up to 1 gallon, until the canister is full. Keep it warm and allow it to “cook” for up to a week, give or take. When you’re happy with the taste, pour off all but 2 cups of the tea, leaving the scoby in the canister, too.
Repeat the process with a new batch of tea. Enjoy!
I’m so glad I found this website! My in-laws drink this daily and I’m wondering how much of this tea can they actually drink. I know you mentioned something about drinking it throughout the day or with your breakfast, they only drink about 3 or 4 ozs. 2 times a day. Can they drink more than that?
Monica,
The literature on Kombucha is very experiential and less scientific. For me, I had to work up to having 8 ounces per day because I got lightheaded. My husband drinks about 8 ounces three times a day and it has been very beneficial for his overall health. One thing to keep in mind is that the more you drink of K-Tea, the more water you should also drink. Because of the detox action of the K-Tea, you could get dehydrated if you’re not careful.
So unfortunately, I can’t confirm whether what they’re doing is allowable or not. It certainly seems like a modest dosage. Their own bodies should tell them whether it is working for them or not.
Hi there-
Great site with some great tips and advice. I’m in the process of getting myself to prepare my first ever batch of kombucha. I grew my mother from a bottle of GT’s Raw Kombucha (gingerade). I heard you could do this, and indeed it did grow a mother (quite a healhy one at that). My quandry is this. I presume since it took nearly 10 days at room temperature to grow, that the original tea is quite fermented and possibly vinagarey (sp?). I see that most recipes recommend using either a cup of old tea to add to the new batch, or you can substitute about a 1/4th of a cup of distilled vinegar as well. I was thinking of meeting these guidlines half way, and adding a half cup of my old tea to my batch, but was worried it might introduce some bad stuff to my batch.
Any ideas or thoughts on this matter?
Regards,
Rob
Use the old Kombucha, vinegary or not. The new Kombucha needs those bits of scoby that are floating in there, not any level of sugar. Hope it works out for you! -Wardee
We don’t live stateside so I’m of the opinion the “free shipping” link has the greatest chance of becoming not so free and not so reasonably cheep!! I’m an old scratch brewer and it was in the back of my mind of hopefully starting a mother from a bottle of boughten K. Hence I read this comment from Rob! My thought process tells me that any boughten bottle of K should NOT be pasteurised! Reading off both your recipe and Rob’s comment re he “grew my mother from a bottle of GT’s Raw Kombucha (gingerade)” and where you made the comment about like brewing the yeast is in suspension albeit in smaller minute quantitie[s]! Can you -to your knowledge make a yeast starter from a boughten bottle? (To do this with beer, say a bottle conditioned brew you drink the top part, keep the sediment and add a coup[le oz on bottled malt extract cover and leave in adark warm place for 3-6 days and voila!!)
Thoughts! Can I staert a mother this way?
Yes we keep a Canadian address, south central Ontario.
Buying from places like amazon or ebay or others of the ilk ordering from your side quickly can become expensive esp as they generally use a pricing formula(-and separate companies that do the shipping!) instead of what it actually costs to walk into a PO and stick a second stamp on the package!
Love your stuff here!
Hi Greig,
You may be able to do that. The scoby does develop from the raw kombucha. Trying to brew from your homemade (raw) beer in the same manner would be worth the experiment. Let us know how it goes!
~Millie, TCS Customer Success Team
This is my first batch of kombucha alone;). If I have two scobys I want this store do I add brew and just keep at room temp?? How long can I leave it there if it only has a little amount of brew in it
Hi, Lori,
Great question! We have information on how to store your extra scobys here: https://traditionalcookingschool.com/food-preparation/recipes/how-to-create-a-scoby-hotel/
~Peggy, TCS Customer Success Team
My mother got me started on this tea a few years back, I was a believer of the tea. However a few years back I moved and the container that the mother mushroom was in became cracked, and there were glass shards in the tea, need not to say I dont have my mushroom or tea any more and over the past few years forgot about it. I just came apon your site and got excited about the tea again.. Do you know where I can obtain a mushroom, or recipe to create my own… I hope to hear back from you.
thanks for your time.
steve szymanski, anchorage alaska…
Steve, I emailed you.
-Wardee
I checked my email and havent seen your email, If you could please email me again, I am sorry about that… I apprecieate your time and information… thanks again…
steve szymanski,
anchorage, alaska
I’ll send again, Steve! -Wardee
I would love to also get a stony from you! I am excited to try this!
Do you have any recommendations on doing a half recipe?
Also, I had a tea bag explode on my culture and it seems to be absorbing it. I have made a batch of tea since then and it turned out fine. Any thoughts on that?
Stefanie,
With regard to the loose tea leaves, that is fine. That happens to me also. They just become part of the scoby — isn’t that what you’ve seen? I wouldn’t be concerned at all if your batches are tasty and smell good.
For a half recipe, start with 3 tea bags, 4 cups of water, 1/2 cup of sweetener. Make the sweet tea. Add it to a half-gallon jar, along with some mature K-Tea and the scoby. Add water to almost the top. I hope this will help you and that I understood your question correctly.
Yes, the tea leaves are a part of the scoby! I am glad to know it’s okay.
Does the half recipe cut the fermenting time in half as well? I made one and I estimated it will be ready after four days. What do you think?
And a big thank you for responding so quickly and I hope to try some of the recipes on this blog soon. 🙂
Stefanie
Stefanie, halving the recipe won’t shorten the amount of “cooking” time. Sorry! It still needs that long to develop. Of course, depending on the conditions, it could be faster. For instance, if you keep your house really warm. 😉
Does it matter if you use raw agave or honey if you are going to boil it anyway?
Kelli
kelli, ill share my own experience: since i use good ‘raw amber agave’ almost exclusively, when i make kombucha i just make the tea and let it cool before i add the agave. it mixes in fine and turns out great.
but i doubt it would matter if you boiled it because it will all get eaten up by the scoby anyway and chemically changed.
however, it would be a shame to use truly raw honey which is so healthful and so expensive, if you are going to boil it!
gab
Kelli — it is a good point. You’d want to avoid boiling anything as good as raw honey. I’d still have a hard time purchasing non-raw honey myself. 😉 So I think the best thing to do is do what Gabrielle does.
Hi Wardee,
I was just reading about your no sugar challenge, and noticed that you were still drinking Kombucha. I have been brewing and bottling my own kombucha for a while, and also thinking about reducing my sugar intake. I’m curious – what’s your opinion on the residual sugar content in a batch of kombucha? I understand that the sugars are eaten during the fermentation process, and sometimes even turn to a bit of alcohol, but Im not convinced that it’s all gone, even after 10-14 days. What are your thougths?
Courtney
Courtney – Hi! We brew our Kombucha until it is very sour. Even so, I think there must be some left. We’re okay with it because of all the benefits of drinking Kombucha. If you’re wanting to reduce sugar intake, take a look at foods with sugar that don’t have other benefits outweighing them. In our case, we were eating a ton of sweets, something sweet everyday. Be sure to let me know what you decide; I’m very interested in hearing more from you. I learn so much from others!
Hi Wardee, Oh my goodness, I just found your blog a little while ago and it is sooo interesting. I have tried Kombucha but, like you said, it made me light headed and I thought because of that I shouldn’t drink it so I stopped. I have always heard too, that it is so good for us but not heard enough to really know why. Do you have any info coming up in future blogs (I, of course subscribed just now too) telling why it is so good? How do I get a mushroom? And where do I get the gallon jars? Can it be refridgerated or should it be kept at room temperature to drink? This is so wonderful, can’t wait to hear from you. Thank you, Michelle
Hi, Michelle! You are so sweet! I really can’t tell you whether or not to stop drinking the Kombucha. Sometimes it affects me more than others, but I do keep drinking it. I just make sure it is at a time when I can sit down or lay down for a bit afterward. There is so much information about why it is good and I will try to do a post soon about that. I would be happy to share a scoby with you; I only ask reimbursement for shipping. Please use the contact form to send me your address and we can make payment arrangements. I get gallon jars from Azure Standard; I believe it is the best price anywhere, but that assumes they deliver nearby, otherwise shipping could double the price. You can refrigerate the Kombucha or refrigerate it. Most of the time, we drink it at room temperature. Then it is usually bubbly – the fridge stops the bubbles. 🙂 Hope to visit with you again soon!
hi,
i just found your place, looking for a recipe for kombucha, make with honey.
i saw that you were doing that then quit because someone thought it might kill the scoby. i note that it did not kill it when you were using it, and i used to make it with honey, but lost my starter and recipe, hence my search on the web.
what i wanted to mention to you is that perhaps honey is not “antimicrobial” in its own right. it is a very thick sugar solution, and the concentration of sugars may be what gives honey its antimicrobial and humectant properties. once diluted, it is not likely to be antimicrobial…….
think for a moment of fruit leather, or dried fruit. it does not mold or rot, and that is because the natural sugars are at a high enough concentration to make it a hostile environment for microorganisms.
i think you should feel safe in using honey, and if you were to keep one or two of your jars going with honey kombucha, you would not be risking all…..
thanks for your recipes
canyonwren
.-= canyonwren´s last blog post… Silverjack and Cimmaron =-.
Canyonwren – I love your thinking! It would be a good idea to do a long-term experiment with honey side by side with the other sweeteners. Thanks for suggesting it and adding your reasoning.
Hi Wardee,
Have you tried the double fermentation method using fruit juice in the second step? I read an article over at foodrenegade and wondered if you have tried it. http://www.foodrenegade.com/how-to-brew-kombucha-double-fermentation-method/
The process looks like it can take up a lot of space. Where exactly do you keep your jars? Is it a corner of your kitchen counter or in a cabinet, or cupboard?
.-= Marg´s last blog post… Picking saskatoons =-.
Marg – I have never done the double fermentation – if you try it, be sure to let me know how you like it? I have friends here who have done it.
Wardee,
My first batch has been brewing for about 10 days. I did a taste test and it is all doing pretty well. My jars are different sizes (one is gallon and three 1/2 gallon) so they are all a little different. Only one has a really well formed new scoby, the others are still pretty thin. Anyway, just wanted to share that batch #1 seems to be successful! Thanks for your instructions and tips, they have been helpful!
Blessings,
Sara
Sara – That’s wonderful! Give those others time. If you’re seeing a thin scoby forming, that is a good sign. Sometimes they take more time, as you said.
Hi,
Someone gave me a mushroom which has grown too large for any jar.
Is it ok to cut it?
Hi again,
I read all the above comments.
I had been wondering about many of those points and found it very helpful to hear what people have said.
I also have those questions about sugar. I know my liver doesn’t like it.
I know that sugar as such robs the body of calcium. Do you know anything about Kombucha in relation to osteoporosis? I have heard that cider vingar is bad for the teeth – makes them rot. What will it do to the bones, if that is true. Vinegar is supposed to clear the joints. It will dissolve an egg shell, what about bones..?! Will Kombucha have negative effects on bones through too much acidity? On the other hand, when there is still some sugar left, it may also affect the bones..? I would love to hear some research results on this.
Thanks again, Star.
I noticed the strainer you used was metal. My Kombucha instructions from cultures for health say to never let the culture touch metal and to not use rapudura. So I am getting confused with all the different information. They do not give any reason why they dont want you to use these things. So I was wondering what your reasons are for using them and maybe you have an idea of why they would say not to. Thank you!
Hi, Tracy. You’re so observant! 🙂
On the sugar, I think most people use white sugar because Sally Fallon Morell wrote in Nourishing Traditions that when consuming white sugar, the scoby produces more glucuronic acid (a powerful cleanser). Rapadura and honey work as well, but the glucoronic acid produced is less. I personally do not wish to use white sugar, so I don’t. If Kombucha is a traditional fermented beverage, then my choice is to use a traditional sweetener – white sugar is not that. But you can use white sugar – in fact, the scoby will eat most of it, so I don’t see a problem either way.
On the issue of metal – you’re right. Metal should be avoided with all cultured foods. I use stainless steel utensils when I have nothing else available and when I know the duration of use will be short. It is a risk I am willing to take in order to avoid plastic use, or buying another utensil.
I just got the scoby you sent me yesterday, and I’m making kombucha today!! I have to tell you, the scoby smelled soooo good!! I imagine that’s how your kombucha smells and I’m very excited. Am typing this as the tea cools. I read a story about someone who cut her scoby in thirds and threw the rest down the drain???? I have a gallon jar and the scoby fits perfectly, so I’m guessing that it will just thicken?? This website is such a blessing for those of us trying to eat the “traditional” way. Thank you, Wardee!!
Connie- wonderful! I sent you the diameter of scoby for a gallon size jar, so just use it – no need to cut it. It will thicken (height). And, I think you read that story here:
https://traditionalcookingschool.com/2010/02/15/rfqm-scoby-gone-wild/
Funny story!!!!
i read about this and googled the closet place to where i could buy the unpasteurized organic raw un juiced tea! an hour away, i grew my own mother for my starter and im going to start my first real batch tom. sometimes if its too vinegar like i just make a cup of tea let it cool and mix it with the kombucha.. in fact thats mostly how i drink it, mix it with tea, but its good alone also…
for me to grow my mother from the directions that i found it took me few weeks, but now shes good to go 🙂
Your kombucha looks wonderful! How did yours get so transluscent looking. I use rapadura now, but mine is a murky color, and the taste is different. I use to use white sugar, and it looked like yours. What do you think I’m doing wrong?
My husband has asked me to go back to using white sugar, because he prefers the taste better. I got excited when I saw that yours looks the same as when I used white sugar.
Sherri – Those pictures were taken when I was still using agave. However, now I am using Rapadura and it looks the same. So I am stymied. I don’t think you are doing anything wrong. Maybe it is because I use jasmine green tea instead of black tea – what tea do you use?
Hmmmm…I use black tea. Does the type of tea make a difference in color and taste? This is the first time I tried something different than white sugar. I guess I was thinking the molasses in the sugar changed the color and the taste, but if yours has that nice dark gold color, then I must have not done something right.
Wardee,
Thanks for sending us a starter!
We tried making one a few months ago with the store bought and didn’t really trust what we were looking at. We got yours a little over a week ago and brewed it with black tea for about 7 days. It turned out great! It was also tasty with some shredded ginger.
We are now on the 2nd brew using Jasmin Green tea! Very exciting!!
Thanks again!
– Jason & Amnee
Would it also work to use quart jars for Kombucha making?
Yvonne – Yes, it would. Just scale down the recipe. The scoby will fill whatever size container it is given.
Wardee, I should have read the link BEFORE replying to your email, lol! You talked about honey right here! : ) I love kombucha and look forward to making my own. Thank you!
.-= Salihah´s last blog post… The Little Sultan Has Arrived =-.
It has been two full days and the scoby is still hanging around the bottom of the jars – not flat on the bottom – there is about 1/4 to 1/2″ space. Is that OK? I am not giving up, I just thought it would rise faster than this? I have not tasted it but it smells OK.
I would love to get some starter if possible, I just love kombucha!!
I just need some scoby….pretty please. I live in Portland, Oregon.
thanks,
terri
Terri,
Here is a website that shows how to grow a scoby! http://www.foodrenegade.com/how-to-grow-a-kombucha-scoby/
I used these instructions and am now making kombucha using GNOWFGLINS instructions. It is fairly easy…just do what she says on this website. I love the homemade kombucha even more than the $3.50 and $4.00 bottles I used to buy.
Hi Wardee,
Is it possible for you to send starter scobie through the mail? I live on the east coast. If yes, please send info for your needs ($). And,if not, do you have any recommendations?
I notice that your jars look like pickle containers…. guess I will have to start with that? My thoughts also went to spaghetti jars, tho’ they are much smaller….
Thank-you,
Laura
[email protected]
Laura – I do have scobys now and then, and I have some right now. Please use my contact form to give me your details. 😀
https://traditionalcookingschool.com/about/contact
HI Wardee,
I have a scoby/mother/mushroom that has ben in storage in the fridge for a while, but no mature kombucha for the 10% needed in your recipe. Will it work with just the mother?
Thanks!
Tina – You can use raw apple cider vinegar in place of mature Kombucha.
Have you tried water kefir? (a.k.a. Japanese water crystals) They make a delightfully refreshing probiotic drink as well. AND they only take 24-48 hours to do it! 🙂 Lighter flavor than Kombucha, but a nice alternative.
Kathleen – Yes, we do water kefir! We love it, and lately have been having it far more often than Kombucha. You’re right it, it is so quick to brew! I make 2 gallons every other day to keep us cool and refreshed during the summer.
Hello on the Kombucha discussion. Wondering if anyone has tried the “continuous brew” method. We just started it after reading about the method on a few websites. We bought a ceramic 2.5-gallon water crock with spigot. You keep 1.5-2 gallons constantly in the crock, but each day you “harvest out” a 1/2-gallon through the spigot, and replace that amount in the crock with cooled sweet tea. It’s nice b/c you never have to fully empty, clean, etc.
My one problem, though, has been that my mushroom grew so, so big within about 3 weeks, though, that I had to harvest all of the kombucha and start over with a smaller mushroom (I just cut my current one in half). This produced an immensely sour drink, literally like drinking Apple Cider Vinegar, so we had to toss some of it and drink the rest mixed with juice. I believe it (the sourness) was due to the larger amount of starter and very large mushroom, and that I let it go for the usually recommended ~7 days. In looking back, the finished product was probably ready in 3-4 days, but I let it keep fermenting for another 3-4, and perhaps I shouldn’t have let it go that long . . .
Any feedback on these experiences?
I’m having the same issue with using a bigger container. I can start a completely new batch and it is ready for its second ferment by day 3 or 4. Much longer than that and it gets too sour for me and quickly turns vinegary. I’ve just had to learn to pay closer attention to it lol
Hi! I am waiting for my starter in the mail and just want to make sure I have everything I need on hand. After the Kombucha is brewed, can I store it in old glass water bottles with screw on lids? Does it have to seal to keep the “fizz” in?
Thanks
Miriam — For it to keep its fizz, the bottles must be completely air-tight. Otherwise, the built up gases escape. I find that mason jars with screw on lids/bands work pretty well. Be sure when you open up if the pressure’s really built up, though. 🙂
I know you have children and I’m assuming they drink it too. I’m wanting to start making some, and have finally found a “mother”. I have 3 young kiddos and I’m wondering how safe it is to drink. I know it does have an alcohol content, but I don’t know how high it is. Advice or information?? Thank you very much. By the way, love your blog!! I’m so thankful for people who have gone before and are willing to share with others. THank you for taking your time and sharing your love with others!
I know this is a year old discussion but if anyone checks, Ihave a question! I have made my own scoby from Synergy raw Kombucha. It is small in circumference and took about 3 weeks to form. It is very cute and I made tea and sugar and added as the recipe said. It seemed really fine in my half gallon jar about four days, today it dropped to the bottom and is slightly tilted—–is that unusual—-I am planning to get one gallon jars but I was trying this with smaller amounts
I love this website!
Jean Finch
Jean– If the temperature is cool (or sometimes even if not) sinking and floating tilted in the jar is normal. If it gets warmed up more it will usually float to the top. You can help it by using a wooden spoon and trapping some air underneath it to get it up to the top. It could also be forming unevenly and one side is heavy than the other. Anyway, if it is growing, it is doing fine. 🙂
Thanks so much for the prompt reply——It has turned cool here for a few days! I will try the wooden spoon idea and I feel so much better allready!
Jean
I’m curious about the straining. Is that just a personal choice or is there a reason for it?
When I pulled my first batch of kombucha off to individual bottles to double-ferment with some ginger, they started making babies up on top of the bottled kombucha within 3 days. Talk about a healthy, active culture! I did mis-read directions and used more sugar than I should have, which likely explains it. Maybe I’m weird, but I just gave the bottle a little swirl and drank it mini-SCOBY and all. Should I not do that?
SulaBlue — It is personal preference. I get new scobies growing on all finished Kombucha I leave sitting around at room temp. You can eat/drink the little scobies or not, up to you. I usually pull them off and put them in the compost for the chickens. 🙂
I got my baby from a friend. I am on my second batch but the baby is still really thin. Is this ok/normal? I took the baby from which is now i guess my mother and jarred it with two cups of the batch ,wanted o see if it would get think. Kombucha taste great but I was concerned about the thickness of the mother. Should I be?
Kathy — It is fine. It will take time to grow. Even a baby makes good Kombucha. 🙂
Hi Wardee! I recently started making my own kombucha and I wondered if you have any thoughts on the safety of giving it to children due to the alcohol content? And do you know what the alcohol content typically is? There is so many different opinions out there and I really value yours.
Linnae — I tend to think that small amounts are okay. Build up slowly and keep it to a few ounces a day. That’s my practice with little ones.
Thanks!!
I am ready to make my first batch of kombucha and have the suger/tea cooling. Cultures for life says in the instructions that I must add white vinegar when its cool. I don’t see that in your directions and am concerned that adding the vinegar would make it really sour. What do you think about adding or not adding the vinegar?
Sherry — You add raw apple cider vinegar if you don’t have finished kombucha (with active cultures). It helps your ferment get going the first time. I think you could probably skip it, but your first batch might take longer to finish.
Hi Wardee! I am fascinated with the wealth of information you have available! So much to learn! Thanks SO much for all your work!
Just a quick question: What do you know about the continuous kombucha brew? I am trying to decide which way to go…
Wardee,
I know this is an old post but if you still check it I have a question. Do you still have kombucha scobys that you will send for shipping? I live in northern Indiana. Is it too cold for them to come thru the mail? Thanks
Jenny
Hi, I am a very new on making this tea. I have been in transition and still have a mosrhroom on my fridge for almost a month with no ventilation at all. Do u know if it is still good to try to make this delicius tea? I hope I did’t waisted.
Margarita — It is probably fine. Give it a try!
What is your take on using Red Rooibos for kombucha? I’ve heard from some places that it’s okay and then others that it will kill the scoby. I can’t use any tea from the actual tea plant (black, green, white, etc)
I trust your judgement though, and wondered if you had any experience with using something other the tea plant.
Lindsey — I haven’t done red rooibos, but I use all kinds of teas without any harm to the scoby. I also break the “rule” by using honey. So while I can’t guarantee your scoby will be fine, I have to say I’d do it myself.
What is the benefit of filtering the sediment that forms in the tea? I thought that was healthy to drink since it is also in the Kombucha one can buy in the store.
Lucas — The bigger chunks are not that fun to eat. But there’s nothing wrong with it. Keep it if you’d like. Alot of sediment passes through my strainer — but the strainer catches the big stringy, gooey bits that my family doesn’t like dribbling down their chins. 😉
I have scoobys as well as water kefir grains if anyone is interested. email me with your snail mail address and I’ll be happy to share. [email protected] —-Jenn
Your kombucha is so fizzy! Do you refrigerate it or keep in in that jug on the counter? Do you do a second ferment with flavors?
Susan — I refrigerate it, but sometimes keep out one jug. Keeping at room temperature keeps it bubbly, but it keeps fermenting and gets more sour. So I prefer to “hold” the taste through refrigeration. I don’t often do a second ferment. We like it after the first. 🙂
I don’t know if this will be seen it’s an old post, but has anyone ever used maple syrup for making kombucha? It is nearly sugaring season here in Vermont!
Morgen – I have not tried that. But I have used almost every other sweetener successfully, so I think you should give it a go. If you can afford it. 😉
I am very interested in making my own! I usually buy organic, but has become costly. I’m sure you wrote where we can purchase scoby, but using my phone has it’s limitations. Can you please tell me once again where to purchase? Thank you!!
Hi Deb,
You can order a scoby from Cultures for Health. I ordered my first scoby from there and it’s been great!
Millie
GNOWFGLINS Support Team
Hi! I have been following your posts and subscribing to your emails for a while. Have been working my confidence up to trying Kombucha. Finally, spent the whole summer growing my own scoby from store-bought Kombucha (read mixed reviews on whether it could be done or not- and it worked!) I had almost an inch thick scoby, wide-mouth mason jar sized, and split it in two so I could do two large jars. I went on faith that it wouldn’t hurt the scoby. So I have finished my first batch! My house tends to be on the cold side, so it took several days for the scoby to start floating and looking active, but it eventually did. I left it a couple days extra and just checked it. Very sparkling and all looked healthy. But my question is this: is it possible that the Kombucha could go bad without any real sign of it being bad??
Mine had fermented so well that it had very little sweet left and certainly was over-sour. It is also very yeasty. But there is another taste or flavor in there that I can’t put my finger on… Almost an “off” taste and smell to it. Is this just an abundance of the yeast? I added fruit juice for a second ferment and can still taste it. There was no sign of anything I didn’t trust, only bubbles and foam on the top of each jar, but also a little yeasty brown growth that wasn’t attached to the scoby. Was that bad? Any help you can offer would be great. 🙂
Thank you! This is THE BEST kombucha info that I’ve read… and I’ve reviewed alot! I’ve been brewing my own for a little over a year. The first several months my kombucha was great. The last 8 months it has been very vinegary. I can barely stand it. I don’t do a secondary fermentation, but will try that with some fruit. Maybe that will sweeten it up a bit.
I use organic black tea and a cup of raw sugar. My scoby grows like crazy! My home never warms beyond 70 degrees so I don’t think it’s getting too hot and I leave it for 10 days.. still extremely vinegary. I’m hoping I can correct it because I love Kombucha but having a hard time drinking my own 🙁
Warlee……great site and before I asked a question I read through all the other questions but I did not see anything close to mine. I have been making K-tea now since July 2014 that was after I grew my own mother. I have been fermenting along and the tea results have been good. Tonight I bottled my brew and when I opened the cupboard where I store them for about 3-4 day before them in the frig, I was horrified to discovered that I had left my last batch in there for a total of 12 days. I burped them the first 4 days but some how I forgot they were there. My husband carefully removed and dared to open them about half burped but the other half, wow it was like having a half frozen soda in the freezer and then you open it. There was so much pressure and it was fizzing out tea. We sat them in the sink and let them bubble, then we decided that enough presser had been let out so we opened them all the way. we had to hurry up and take a large gulp out of each one so there was room for all the bubbles. I might say that the brew was surprising good with a slight bearish taste so we put them in the frig but quickly realized that we both got a buzz from taking them gulps. My question is I guessing that the alcohol content must be pretty high, so will we still receive the benefits of the tea with that higher alcohol content? I am thinking that we can cut it with fresh tea and be okay drinking it? We were so lucky that those bottle didn’t explode that for sure. Now I have a sticky on the cupboard door saying KOMBUCHA in here with the date. Sorry for the length on the comment and again love love love your site.
I am going to start making my own kombucha for the first time. My question: can any kind of tea be used? I have a TON of different flavored teas (loose/bagged/black/green) that I would like to use up….
LOVE your site and information!! Thank you!
As a diabetic that needs to keep her carbs down, I am wondering how many carbs there are in a glass of this.. Also, is there any sweetener you can use for diabetics, like Stevia? Would that work too? thanks
I was wondering the same as I am also diabetic. Did you ever get an answer? I have been brewing my kombucha for about a month or so and love it. I know your post is from quite a while back so I do not know if you will even get this.
Stevia will not work as it’s not a sugar, fermentation can’t happen with chemical sweeteners as bacteria need to eat sugar.
The sugars in fermented kombucha will be reduced drastically – check the ingredients and nutritional label on store bought kombucha for an example of carb content, though you can’t count on this being the same for your home made version because you may use more or less sugar than they do at the factory.
Test your blood sugar after drinking it, maybe that will tell you something.
Do you know if there is caffeine in the kombucha after it’s been fermented?
Hi April,
Yes, caffeine remains. Although it varies batch to batch, there is less in the finished Kombucha than in the tea used in the beginning. 🙂
Millie
Traditional Cooking School Support
Is there a way to fix my vinegary tea. I still have bubbles. Can I just add a little sugar water and let it sit for a couple of days?
Hi Annette,
You can add sugar and let it set a few more days. Or you could sweeten each glass as you drink it. 🙂
Traditional Cooking School Support
Thank you for this information.
Just recently started following you on Facebook. I do not to kombucha, but we do water kefir. My daughter has fibromyalgia, and has suffered with it for 15 years. Through a co-worker of my husband- who also has a daughter with fibromyalgia- we were introduced to the water kefir. It has done wonders for her. It’s easy to do, and not expensive. The co-worker gave us a starter with the grains and we were off. Now my husband and I find it very helpful for ourselves. Do you use it? From what I’ve been able to find, it is mainly considered a probiotic drink/aid. Not sure what the connection is with fibromyalgia, but both our daughter and the co-workers daughter have seen tremendous improvement through its use.
Hi LaVorna,
Yes! We love water kefir. Here’s one of the articles we have for it on the blog: https://traditionalcookingschool.com/2009/12/18/whats-so-great-about-water-kefir/
Wonderful that it is helping your daughter so much. 🙂
~Millie, TCS Customer Success Team
Has there been any documentation on the difference in any other constituents beside glucuronic acid when honey is used?
Hi Fayette,
I’m sorry, we don’t have any information on this.
~ Millie, TCS Customer Success Team
Wardee,
You have mentioned not using any metal utensils with your Kombucha. What kind of strainer do you suggest if I choose to strain out my flavorings after the second fermentation? Also, I would love to have a couple of SCOBYs from you. I have been using small ones to make a gallon at a time and I’d love to have two larger ones. During the brewing time, I read you suggest the ideal temp to be 76 degrees, another site suggested 80 degrees, is it that sensitive and what range would you suggest?
Hi Wilma,
Brief contact with metal to strain your kombucha is fine. I use a metal strainer for mine. 🙂
Your scoby should grow to the diameter of your brewing vessel.
Kombucha is best brewed between 68-78 degrees although it can be brewed higher. The warmer it is the faster it will ferment.
~Danielle, TCS Customer Success Team
I have been making kombucha for several years, and the scoby always looks about the same, but recently, I opened up my continuous brewer to add new tea, and found a very weird looking scoby. It fell apart into little squiggly shaped pieces instead of one smooth piece. The kombucha still tastes good and everything smells normal, and it doesn’t look like there is mold, but I’m worried, because the socby is so very different than what I’m used to. I sure would appreciate your help in troubleshooting this.
Hi Lynette,
We haven’t experienced anything like this. But if the scoby is still making Kombucha and otherwise seems fine, we would keep going and let it adjust to whatever it experienced — unless we saw mold, in which case we’d toss it.
Hope this helps!
~ Millie, TCS Customer Success Team
Thanks for the article
Is really helpfull.
One question, can I use an sweetner like stevia or Splenda instead of sugar?
Thanks
Hi Martin,
Kombucha requires sugar so the soby can feed and ferment the tea.
To reduce the sugar level as much as possible you can ferment it up to 28 days and the sweeten it to taste with stevia.
We do not recommend using Splenda.
~Danielle, TCS Customer Success Team
What is the best way to sterilize the fermenting jar and the storage bottles? I’m new to this and read that you should not use any type of soap. I used distilled vinegar and swished it around each container is this OK? Is there a better way to sterilize?
Thanks,
Paul
Hi Paul,
We haven’t heard to not use soap. We teach hot soap and water, rinse well, then air dry. OR use the heat cycle of a dishwasher.
~Danielle, TCS Customer Success Team
Very nice post
Wardeh,
Thank you for sharing this with us. Question for you. Can I use a strainer bag to cover it or is it better to use a towel?
Hi, RoseC,
As long as it keeps out fruit flies, dust, or other contaminants and be sure to secure with a rubber band it should work. 🙂
~Peggy, TCS Customer Success Team
Thank you Peggy! I have started my first ever batch today. Can’t wait to see how it turns out.
Never thought about jasmine tea, always loved it but never tried with kombucha. Will try it for certain!
How do you make kombucha without pre-existing kombucha or a scoby?
I want to start entirely from scratch, but no one seems to have a video or article on it anywhere. They all have a scoby handy or use store bought kombucha as a primer.
Hi, Chris.
Some people use plain raw kombucha (store-bought or locally brewed) to create a new scoby.
You would brew two tea bags in 1 cup of water with 1 Tbsp of sugar. When cooled, add 1 16-oz bottle of plain, raw komucha.
It can take up to three weeks for the scoby to form.
~Danielle, TCS Customer Success Team
Hi!
I may have gotten overly ambitious with the amount of tea used, I just converted how much tea if use for a cup of tea into a gallon, so used way more than your recipe calls for. Will this be damaging or just make a really strong flavor?
Thank you!
Hi, Emily,
It will make a strongly flavored kombucha.
~Peggy, TCS Customer Success Team